This article will help you get complete knowledge about anchor point archery.
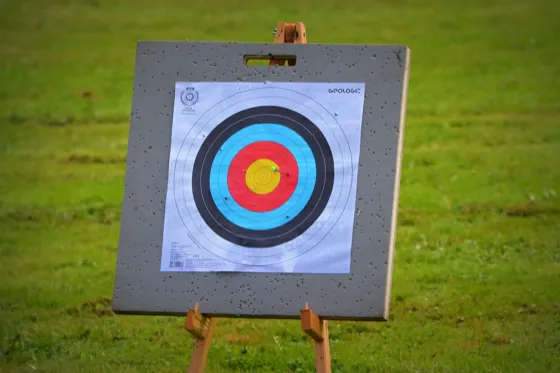
Archery is all about accuracy and consistency.
As an archer, you want to hit your mark every time you draw your bow and shoot.
In other words, your goal is to repeat your clean shots over and over again.
Because of this repetitive nature, archers must focus on the form and alignment of their bow and arrow.
After all, if you’re going to repeat a shot accurately, you must first master every aspect that came in to play to achieve that shot. Our guide to proper archery form walks through each of these fundamentals step by step.
This is where using an anchor point or “anchoring” comes in.
In a nutshell, an anchor point helps you attain the must-have consistency in your shots.
Here’s how you can find your anchor point:
-
Learn what an anchor point is.
-
Go through a three-step way of finding your anchor point.
-
Look at common anchor points, tips, and what to expect when finding an anchor point.
-
See which anchor points archers use with the various types of bows.
What Is An Anchor Point?
When you hear the word “anchor”, you’ll most likely think of a boat anchor.
Let’s consider that for a moment: the boat anchor holds the boat at bay and prevents it from moving.
Enough about boats, let’s go back to archery:
When you draw a bow, it comes close to your face.
At full draw, your release hand (the hand you’re pulling with) and the bowstring will touch a spot on your face, that’s your anchor.
Simply put, an anchor point is a spot on your face where your release hand and bowstring hold on to at full draw.
Just like the boat anchor, an anchor point prevents you from placing your drawing hand on different spots every time you draw your bow.
It’s the best, if not the only way to ensure that your shots are consistent and to remove variation between your shots.
Purpose Of Anchor Points
The purpose of anchor points is to help you develop a shooting routine.
Once you identify the “touch-points” that your drawing hand and bowstring touch to get a clean shot, you can practice on it.
Ingrain it into your subconsciousness and use those exact spots every time you shoot.
When you find your anchor, it becomes like an instinct which translates to greater consistency and accuracy in your shots.
Archers across the world have different anchor points.
Generally, a good anchor point must be identifiable, repeatable, and come naturally.
You should be able to say, “I anchor on the cheekbone or under the jaw.”
Even more, you should be able to touch the exact point where you anchor.
Being consistent with your anchor point is another important aspect because even the smallest variation can make a big difference on the target.
Next, we’ll look at the steps involved in finding your anchor point.
Steps On How To Find Your Anchor Point
So far, we’ve learned a lot about anchor point archery, and now it’s time to see how you can find the right anchor point.
Hint: It’s all about practice, experimenting, and more practice.
I assume you already know how to draw a bow correctly.
Here’s a checklist to ensure you do it right:
What do I mean by “straight draw force line”?
Your forearm, the arrow shaft, and your target should form a straight line at full draw - this is the draw force line.
It isn’t only important in securing an accurate shot.
Also because any misalignment can cause injury if the shot isn’t straight.
At this point, your drawing hand should be touching a spot on your face, that’s your anchor point.
Note that you should firmly press your drawing hand against your anchor point.
There’re a few anchor points archers use which we’ll talk about next.
-
Is your drawing arm behind the arrow?
-
Is your forearm in-line with the arrow shaft?
-
How about your shoulder, is it rotated and back?
-
Are you relaxed and comfortable?
Types Of Anchor Points
The primary anchor point is usually the release-hand touching a spot on your face.
It’s good to have additional points of contact.
Having more than one contact-point helps you identify inconsistencies because you’ve more reference points.
We’re merely talking about the various spots on your face that the bow hand or bowstring may touch.
They’re not separate from each other, in fact, archers often use multiple anchor points.
The release-hand contact is the major point-of-contact while bowstring contact and peep alignment serve as secondary anchor points.
The release-hand must touch your face to anchor the bow.
Otherwise, you’ll have what we call a “floating” anchor point and your hand will be shaky when you release the arrow.
To create a stable anchor point, one hand-bone should touch a bone on your face because bones are strong unlike soft tissue.
Here are the two most common forms of release-hand contact:
Some people call it the “side of the face” anchor point.
When you pull the bowstring, your index finger on the pulling hand touches the corner of your mouth.
Your thumb touches the upper jaw and the rest of your hand is placed on the side of your face to offer more stability.
You should keep your hand relaxed and flat and you shouldn’t move your hand until you release the arrow.
If you move your hand and shoot, your shot will be as though it wasn’t anchored in the first place.
It’s quite easy to anchor at the corner of your mouth, thus, if you’re a beginner, this is a safe place to start.
At first, it does feel a bit weird, but with practice, you get used to it and see the accuracy of your shots increase. For more ways to tighten your groupings, check out our archery accuracy tips.
With this anchor point, you pull the bowstring towards your face till it touches your chin.
Your hand goes under the jaw and you should press it against the jaw to anchor.
The bowstring touches the lips or nose as a second touch-point.
The under-the-jaw anchor is difficult to achieve.
As you progress, you’ll find this method easy to remember -especially if you use a secondary point of reference.
Professional archers go for this anchor point as it offers more stability which increases accuracy.
When you’ve made the release-hand contact, the bowstring is usually very close to your nose or month depending on your anchor position.
This means you can make this a point-of-contact which is good because you create a second touch-point.
The bowstring lightly touches the nose or lips of the archer.
It’s not the actual anchor point, but it supplements the release-hand contact.
When using the corner of the mouth anchor point, the string-to-mouth contact can be very effective for consistent alignment at full draw.
Most people go for the nose touch-point: either the tip or the side of the nose.
With side-of-the-nose, maintaining consistency is a nightmare.
It’s better to use the tip-of-the-nose because it’s easily identifiable and thus repeatable.
The pressure you exalt on the nose also counts -you don’t want to put too much pressure because it may cause left to right inconsistencies.
Peep alignment isn’t an actual contact point, but rather a strategy to maintain consistency in your shots.
You can only use peep alignment with a compound bow that has a peep sight installed.
A peep sight is a small ring placed on the bowstring to help when aiming.
You look through your peep sight and align it with your sight housing to create two concentric circles.
That alignment gives compound shooters a reference point to further ground their anchor point.
There’s no need to bend, twist, or align the neck and head to see through the peep-hole.
If so, it means the set-up isn’t in the proper form and alignment.
-
Corner Of The Mouth
-
Under The Jaw
Things You Should Know When Finding Your Anchor Point
These are the things you should expect:
It feels a bit weird, even scary, but don’t be afraid.
With practice, you’ll soon find out that it’s perfectly okay and it’s nothing to worry about.
Anchor points vary between archers.
While they’re archers who are successful using under-the-jaw anchors, other archers succeed using the corner-of-the-mouth anchor point.
The most important thing you should remember is that your anchor point should be comfortable and repeatable.
If you’re, it may be because the bow isn’t a proper fit, or you’re anchoring in the wrong way.
Any movement will automatically change your anchor point which defeats the purpose.
There’re a few options to choose from and the best way to find the right one for you is to explore them all.
You’ll instinctively know the one that suits you best because it’ll feel natural.
You won’t find your anchor point overnight.
It’ll take a ton of practice and patience to find it and more practice to maintain your anchor point.
Tips On How To Find Your Anchor Point
Here are some valuable tips and mistakes to avoid when you’re on your way to finding your anchor point.
Your head should be in the same spot on every shot you make.
If you move even just by a few millimeters, you’ll alter the anchor point which will hurt your accuracy.
If you’re doing it right, the facial contact should occur naturally at full draw -don’t force it.
Get someone to point out your mistake if you find yourself placing your anchor point to the bowstring because it’s wrong.
We’ve repeatedly said that there’s no right or wrong anchor point.
Don’t feel tempted to change your anchor point on someone’s advice.
If it feels comfortable, that’s the best anchor point for you.
If you open your mouth, you’ll lower the jaw which will change the anchor point.
Again, if you don’t keep your teeth together, say you chew gum, you’ll alter the anchor point.
Remember that your goal is to use the same anchor point on every shot for accurate shots.
Any movement no matter how small will jeopardize that.
It’s a huge no.
Many beginners make this mistake and end up ruining the bow.
This kind of practice doesn’t help you find your anchor point either.
Because you won’t be able to form a straight draw force line: your shots won’t be straight and you’ll run the risk of injuring yourself.
Many newbies use a “floating” anchor point where the drawing hand isn’t firmly touching their faces.
With this kind of an anchor point, consistency is hard to maintain.
Consider secondary points of contact such as your chin or the tip of your nose.
Because when you’ve multiple reference points, it’s easier to spot inconsistent shots.
If you’ve a video camera, record yourself as you practice, later you can review your progress and spot any mistakes.
You can even record your clean shots on a notebook if you don’t have a camera.
If you do, you’ll be distracted, and you won’t be able to master any.
Instead, practice each anchor point separately and record your progress.
In time, your record will tell you which best suits you.
Types Of Bows & Anchor Points
There are two major types of bows classified based on the drawing mechanism.
With recursive bows, you draw the bow by pulling the bowstring manually while with compound bows, you use mechanics to pull the string.
Compound bows reduce the amount of force required to hold the string at full draw.
In most cases, you’ll use a compound bow with a release aid.
The position of your anchor point depends on the type of aid you’re using.
If you’re using a thumb release, you’ll probably use your knuckle to anchor on or below the jaw.
With the wrist release, you can’t use your knuckle because your hand rotates.
You can use the index finger and again anchor on or below the jaw.
Many compound bow archers have a secondary anchor point.
A “kisser button” - a small item placed on the bowstring - is quite common.
At full draw, the kisser button touchers the corner of the mouth as a secondary point of reference.
You can also use the tip of your nose as the second point of contact.
If you’re not using a release aid, you can use the corner of the mouth as the primary anchor point.
As you can see, compound bow archers can enjoy up to three reference points.
First, there has to be a release-hand contact.
The best anchor should have bone-to-bone contact where at least one hand-bone is touching a bone on the face.
Secondly, bowstring contact where you can make use of a kisser button or tip-of-the-nose contact.
Lastly, peep alignment.
Using a peep sight helps with aiming and it’s a good reference point as well.
With these three spots, it’s easier to spot mistakes and to correct them.
If you watch anchor point archery competitions (Olympic recurve), you’ll notice the under-the-jaw anchor point is quite common.
The good thing about this anchor point is that it gives room for secondary contact.
You can place the index finger of your drawing hand under the jaw and the bowstring can lightly touch your nose or lips.
If you use a finger tab (a small patch of leather placed between your drawing hand and the bowstring), you can use a shelf.
A shelf works like a kisser button.
It’s attached to the finger tab to give an additional reference point as it touches your chin at full draw.
With practice, this anchor point becomes easy, and you’ll remember all the points-of-contact without breaking a sweat on every shot.
Another plus for this anchor point is you’ve more vision because the drawing hand is out of the way.
Traditional and barebow archers don’t use a sight or a stabilizer.
Therefore, they go for higher anchor points so that they can use the arrow as a sighting tool.
They anchor by pressing their index finger on the canine tooth or the corner of their mouth.
If you’re a newbie using a recurve bow and sight, a safe place to start is the corner of the mouth anchor point.
With a sight, there’s no need to use the arrow as a sighting tool and you can try a lower anchor that offers more stability and reference points.
How To Maintain Consistency With Your Anchor Point
Once you identify your anchor point, the challenging part begins - being consistent on every shot.
The best way to achieve consistency is through practice.
Train for at least 5-10 sessions on that anchor point to commit it in memory and remember it every time.
As mentioned before, while you’re training to master one anchor point, don’t try out other different anchor points or any other aspect of archery.
After all the handwork, you’ll be able to remember your anchor point effortlessly and every time you draw your bow, it’ll be anchored at the same spot.
Keep monitoring where you anchor even after the training.
Remember straying from your anchor will significantly hurt your accuracy.
And if you notice a deviation, correct it early enough to avoid affecting your score.
How Can You Tell You’re At The Right Anchor Point?
If you’re at the right spot, you’ll start to feel comfortable with it and your score will dramatically improve.
You’ll be able to anchor at the same spot every time you draw your bow.
Your anchor point must also be specifically identifiable.
It’s not enough to know that you anchor under the jaw, you should be able to touch the specific spot under the jaw where you anchor.
If you can’t, then you may find yourself drawing inconsistently because you only have a vague idea of the spot you anchor.
Also, if you can’t consistently draw at the same spot, maybe that anchor point isn’t a good fit for your shooting style.
Moving your head between shots may also result in inconsistency.
Frequently Asked Questions
The corner-of-the-mouth anchor is the easiest starting point for beginners because it's simple to find and repeat. Your index finger naturally touches the corner of your mouth at full draw, giving you a clear reference point without overthinking it.
Yes, and most experienced archers do exactly that. You'll typically have a primary anchor like your hand under the jaw, plus secondary reference points like the bowstring touching your nose tip or a kisser button at the corner of your lips.
Most archers need at least 5 to 10 dedicated practice sessions before an anchor point starts feeling natural. It won't happen overnight, but once your muscle memory kicks in, you'll anchor at the same spot without even thinking about it.
Final Thoughts
Your anchor point is the foundation of consistent shooting, so don't rush the process of finding the right one. Experiment with corner-of-mouth and under-the-jaw positions, add secondary reference points like string-to-nose contact, and commit to practicing one anchor setup at a time until it becomes second nature.
Once it clicks, you'll notice a dramatic improvement in both accuracy and shot-to-shot consistency.