This guide covers everything you need to know about getting into archery as a complete beginner. We’ll walk through finding a club, choosing your bow, getting measured, picking arrows, building form, and even what it takes to go professional.
Archery dates back to the age of cavemen and has evolved from a hunting and warfare tool into one of the world’s most respected competitive sports. It’s been part of the Olympic Games since 1972, and it’s a sport that anyone can start regardless of age or athletic background.
Here are 12 steps to get you shooting with confidence.
Step 1: Find a Good Archery Club
Your first priority should be finding a reputable archery club nearby. Archery is a master-apprentice craft, and you’ll learn far more in a few weeks at a club than you would in months of self-teaching.
Search for clubs in your area by googling “archery clubs near me” or checking with your state’s archery organization. You can also look into local colleges and high schools, which often have archery programs with safe practice areas.
Prioritize experience and professionalism over fancy facilities. You need coaches who know proper form, not a club with the flashiest equipment.
Most clubs provide gear for newer members, so you don’t need to buy anything upfront.
When you join, be upfront that you’re a beginner. You’ll want an introduction to the equipment of the sport and the basic rules before you ever pick up a bow.
Don’t skip the fundamentals just to start shooting sooner.
Step 2: Decide What Type of Archery You Want To Do
Before you buy any equipment, figure out which style of archery interests you. This determines everything from bow choice to where you’ll practice.
Target archery is the type with ringed targets that most people picture. It’s what you’ll see at the Olympics, and it’s the easiest format for beginners since distance and difficulty are standardized.
Field archery uses walking courses set up through wooded or hilly terrain. Targets sit at varying distances, which makes it more challenging and closer to real-world shooting conditions.
3-D archery involves three-dimensional animal targets set at various distances and angles. It provides an authentic hunting-type experience and is a great stepping stone toward bowhunting.
Bowhunting is real-world hunting with a bow instead of a gun. Many of the above formats give you a chance to practice the skills you’ll need before heading into the field.
Learning about the different types of archery bows will help you pick the right gear for your chosen discipline.
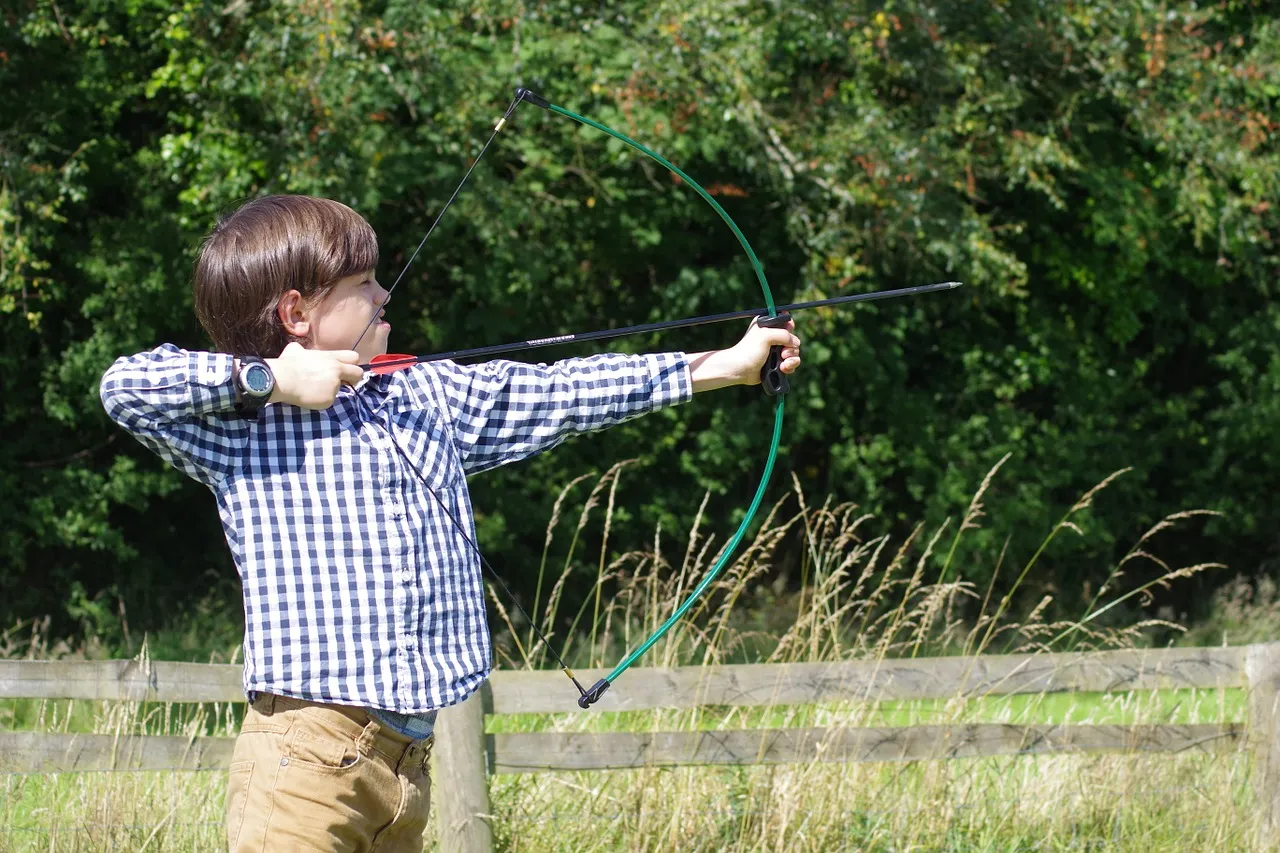
Step 3: Choose Your Bow Type
There are two main categories of bows to consider: recurve bows and compound bows.
Recurve bows are the simpler design. They have a riser (the handle where the arrow rests), upper and lower limbs, and a string connecting the limbs.
This is your Robin Hood or Katniss Everdeen bow and the only type used in the Olympics. Takedown recurve bows have removable limbs so you can swap them out as you get stronger.
Compound bows use a lever and cam system to multiply the force behind each shot. Arrows fly further, faster, and hit harder, which makes compounds a popular choice for bowhunting.
They’re more expensive and complicated, but the adjustable draw weight means you won’t need to buy new limbs as you build strength.
If you’ve never shot before, head to your local club or archery store and try both types before committing. Because they’re so different, competitions are usually specific to one bow type.
Step 4: Get Your Measurements Right
Once you know your bow type, you need to get properly measured. The two key measurements are draw length and draw weight.
Draw length is how far back you can pull the bowstring. You can estimate it by dividing your height in inches by 2.5, or you can have a bow tech measure you at an archery store.
Draw weight is how hard it is to pull the string back, measured in pounds. Beginners should start with a lower draw weight (around 15-25 lb for adults) to build good form first, then increase as they get stronger.
Some recurve bows have a fixed draw weight, which means buying new limbs or a new bow later. Others let you swap out the limbs to adjust.
Compound bows have adjustable draw weight built in, so you can increase it without buying anything new.
Your best bet is to have a professional fit a bow for you. An ill-fitting bow can cause injury or become damaged, so don’t skip this step.
Check out our picks for the best bow and arrow sets for beginners to find the right starter kit.
Step 5: Pick the Right Arrows
Arrows are just as important as the bow itself. Never fire a bow without an arrow, as “dry-firing” can seriously damage it.
Buy your arrows along with your bow for the best compatibility. The rule of thumb is that arrows should be about 2 inches longer than your draw length.
Too-long arrows feel awkward and hurt accuracy, while too-short arrows could cause you to shoot your bow hand.
There are three main arrow materials to consider.
Aluminum arrows are lightweight, durable, and the most affordable option. They’re the best choice for beginners since you’re more likely to break or lose arrows while learning.
Carbon arrows are strong, stiff, and very light, which makes them more accurate at longer distances. They’re a favorite of bowhunters but cost more than aluminum.
Wood arrows have an old-school appeal and work great with traditional bows. They require a bit more experience to avoid breaking, but crafty archers can even make their own.
Step 6: Build Your Physical Fitness
Your physical condition matters more than you might think. The first time you hold a bow at full draw, you’ll realize how much upper body strength archery requires.
Research shows that beginner archers rely heavily on forearm strength to pull the bowstring back. More experienced archers shift to using their neck and shoulder muscles (deltoids and trapezius), which provides greater stability and accuracy.
Focus on upper body and core exercises alongside your archery practice. Stronger muscles mean longer practice sessions, higher draw weights, and more consistent shots.
Check out our archery exercises for targeted drills that build real shooting strength.
Don’t forget about eye health either. Sharp eyesight plays a direct role in hitting your target, so take care of your vision while you’re training.
And before you head to the range, familiarize yourself with basic archery safety rules so you can protect yourself and others from day one.
Step 7: Master the Fundamentals
The shooting sequence in archery follows a specific order: stance, nock, draw, anchor, hold, aim, release, and follow through. Our step-by-step guide to proper archery form covers each action in detail.
Every step builds on the previous one, and rushing through them is the fastest way to develop bad habits. Finger placement, hand placement, and anchor point all need to become second nature before you worry about hitting the bullseye.
Blank bale shooting is a great drill for beginners. You shoot at a blank target (or bale of hay) from close range with the goal of perfecting your form, not hitting a specific mark.
Some archers even practice this with their eyes closed to focus entirely on their shooting mechanics.
Focus your mind during practice sessions. A distracted 60-minute session is worth far less than a focused 30-minute one.
Step 8: Get a Coach
While instructional books and videos can teach you the basics, a live coach will catch form problems that you’d never spot on your own. They’ll tell you when you’re doing something wrong in real time, which saves you from months of reinforcing bad habits.
A coach also provides accountability and motivation. They’ll push you past plateaus and adjust your training plan based on your progress.
Check with your archery club for coaching options, or look for certified instructors online through organizations like Archery 360. Even a few beginner lessons can make a dramatic difference in how quickly you improve.
Step 9: Use Safety Equipment
Even experienced archers never skip their safety gear. Arm guards, finger tabs, and chest guards protect you from bowstring contact that can cause bruising, blisters, and nerve damage.
Your fingers, hands, and arms aren’t used to the forces involved in archery. Without a finger tab or archery gloves, repeated string contact will cause blisters and soreness that sideline you for weeks.
A chest guard is especially helpful for beginners because it keeps loose clothing out of the bowstring’s path and helps develop proper posture. Browse our list of the best archery chest guards and top-rated arm guards to find the right protective gear.
Safety equipment actually improves your shooting too. When you’re not worried about getting hurt, you can focus entirely on your form and aim.
Step 10: Track Your Progress
Keep notes on every practice session. Write down what you worked on, what clicked, and where you struggled.
This creates a record that helps you and your coach pinpoint exactly what needs improvement.
Tracking your progress also keeps you motivated. When you can look back and see how far you’ve come from session one, it’s much easier to push through the frustrating plateaus that every archer hits.
Share your notes with your coach so they can tailor your training to address weak spots. A well-maintained training log makes it easy to analyze what’s working and what isn’t.
Step 11: Practice Consistently
Consistent practice beats occasional marathon sessions every time. Two to three 30-60 minute sessions per week will build muscle memory without causing fatigue or injury.
Your archery club’s range is the safest place to practice, but you can also shoot on private property if you’ve got the space and proper safety measures in place. Just make sure there’s a solid backstop and no chance of arrows reaching anything you don’t want to hit.
For targeted drills, check out our archery accuracy tips that focus on building real skill through deliberate practice.
Don’t forget to balance hard work with rest. Overtraining leads to sore muscles, bad form, and burnout.
Enjoy the process, learn from your mistakes, and remember that every archer improves one session at a time.
Step 12: Consider the Professional Path
If competitive archery interests you, there are several paths to explore. Target archery, field archery, and 3-D archery all have organized competition circuits at local, national, and international levels.
Going pro requires serious commitment. You’ll need dedicated practice time, competition-grade equipment, coaching from someone experienced in competitive archery, and the mental toughness to perform under pressure.
“Target panic,” where a normally accurate archer starts missing by releasing too early, affects almost every competitive shooter at some point. Working with an experienced coach, adjusting your grip, and using visualization techniques can help manage it.
Don’t quit your day job right away. Most professional archers still work outside the sport to support their passion.
Sponsorships don’t come until you’ve won multiple tournaments and built a reputation. Other ways to earn from archery include coaching, creating your own brand of products, and building a media presence.
Frequently Asked Questions
You can get started for as little as $100 to $200 for a basic recurve bow setup. Add an arm guard, finger tab, and a basic target, and your total startup cost is typically under $300. Most archery clubs also offer equipment rentals so you can try the sport before investing in your own gear.
Children can start learning archery as young as 6 to 8 years old with proper supervision and youth-sized equipment. There's no upper age limit either, and many people pick up the sport in their 40s, 50s, and beyond.
Two to three sessions per week is a great starting point for beginners. Each session should last about 30 to 60 minutes to build muscle memory without overworking your body and risking injury.
While you can learn the basics on your own with video tutorials, taking a few lessons from a certified instructor is highly recommended. An instructor will catch form issues early that could lead to bad habits or even injury. Most local archery clubs offer affordable beginner classes.
Final Thoughts
Getting started with archery doesn't have to be complicated or overwhelming. Find a reputable club, invest in beginner-friendly equipment, and commit to consistent practice with a coach who can correct your form early on.
Shooting for fun, fitness, or a future in competitive archery — the most important step is simply getting started. The combination of patience, proper technique, and regular training will have you hitting targets with confidence sooner than you think.


